There are several ways to start a bow :
– Select a branch for its form or species and try to make the most appropriate bow, the more effective from its potential.
– Choose an bow style that you want to use and find the branch that allow it.
In both cases, the choice of the tree is important because it determines the shape and strength of the final bow but also sometimes the way you’ll have to work it.
TREE SPECIES
« Premierement de tous boiz poeult on faire arcs, mais les meilleurs sont de yf ».(in old 15th century french : First, form all woods could you make bows, but the best are from yew). Those were the words of an archer in the late Middle Ages about the woods that can be used
We can certainly make bows with all woods, however the choice of species affect several data:
– The physical properties of wood influence the possible forms of the bow (light or unsuited wood will be processed in flatbow if you want a high strength).
– Some wood have poor resistance in compression (eg hazelnut), the bow section will be different (belly flattened bow).
– Wood density is an important factor that affects the strength (denser wood, strengther bow for a given section)
– The tools do not cut into any wood in the same way.
– Some woods are crooked or gnarled or curvy …
If all the wood can be used, however some species will be more efficient, especially if you are looking for a strengthful bow.
Here are some species that are easily found in our region (Belgium) maybe harder if you live far away :
– Ash
– Black Locust (or false acacia)
– Maple
– Hazel
– Hawthorn
– Oak
– Birch …
We did not realize bow with all of these species, so we advise especially the first ones, but some bowyers have already made the others. To recognize the trees, you will have to find a good tree identification key. Most of the list of trees are common and so quickly recognizable (in Europe).
As our medieval archer/author says, yew is often considered the best wood in Europe. But it will be harder to find! So if you are lucky enough to have a yew branch, practice first with the more common woods.
It is of course possible to find yews in our regions, but they are often planted in parks around old churches, castles, graveyards … in short, the cut of a yew is rarely welcome especially because you’ll have to find 50 years old or more trees to make bows from it.
Yew will not make a bow more efficient or faster. By cons, it will make very heavy bows (over 150 pounds), but we know only a few archers using these bows intensively.
The other advantage of the yew is generally causing less string follow, but we have a trick to prevent this from happening to other wood!
The elm is another ‘historic’ species for making bows. Many prehistoric bows (among the oldest found) were made of elm. By cons, elm has virtually disappeared in Europe because of a disease (in our area at least). That’s still sometime possible to find elms and use them before they are attacked by the desease.
THE BRANCH
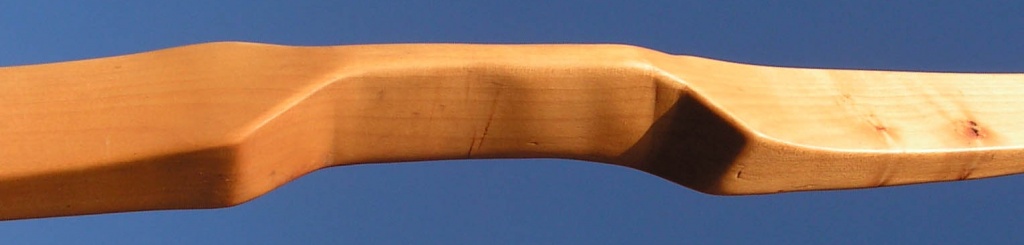
The shape of the branch or trunk directly influence the final bow shape. So some people prefer the ease and beauty of a perfectly straight bow (or almost), others prefer the challenge and the curves of a twisted, snaky bow (the branch will however be easier to find).
Depending on the species of trees and their size, it is sometimes easier to cut a branch or the entire tree. Often grouped trees grow vertically and allow to make bows directly into their trunk. For individual trees, you can sometimes use a straight and thick branch (Amerindians then used the upper part, because the bottom was compressive stress throughout his life).
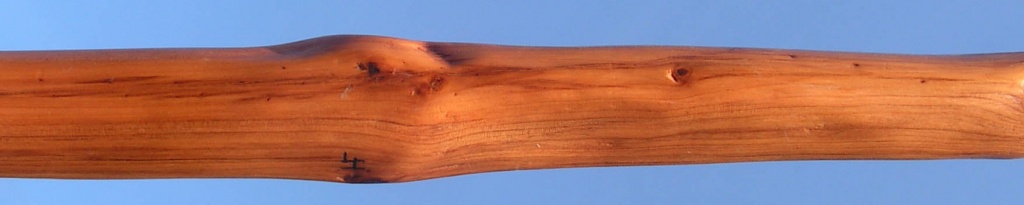
It is also useful to look properly at the tree, leaves, trunk … to try to detect possible anomalies (trees dying, insect attacks …). If the trunk appears to twist, it is very likely that the wood fibers are twisted as well (much more difficult to work, splitting and drying… don’t try except for challenge and experience).
SLOW GROWTH, HEAVIER BOW
« Et tout bois tant plus est de grosse seve et tant plus est volontiers lasche » (in old 15th century french : and from all woods with big rings is more weak)
A same wood can grow at very different speeds. For example, the grow rings of ash can be spaced 1cm for a sapling or 2mm on others.
The author of the Middle Ages therefore indicates that the wood with large rings will be weaker … In reality, changes is essentially the density of the wood, main data influencing the weight of the bow.
In adverse terrain, the tree will grow slowlier, creating a denser wood. The tree should ideally grow:
– in the shade,
– In the middle of other trees
– In difficult ground (rock, rock, land infertile …)
– Not too close to a river/water.
Some bowyers consider the wide ring wood are not able to make bows (or less good)… That’s not exactely true :
At equal strength and length, lighter timber won’t be less efficient.
However, this mainly concerns flatbows whose thin branches reduces internal stresses. The flatbows made in a light wood will have to be wider to be as effective as the same bow made in a wood with more narrow rings (keep the same thickness).
The longbows not really follow this rule because, when done in a light wood, they will have a most important string follow and they will then be thicker and more difficult to handle (bigger archer paradox too) … The thickness influences also stresses in wood, thicker bow will therefore also more break risk or string follow for high strength. These are some reasons to choose a timber with thinner rings for longbows exceeding 50 pounds.
GROWTH IN SHADE, STRIGHTER BOW
The tree growing among other trees do not receive as much light (hence grows slower), its spread is often hampered by other plants. This forces it to grow in height from the beginning of his life. This is the case for young trees growing in forest with mature trees, but also for tight trees (grove …)
Under these conditions, the wood is denser, straighter and have fewer low branches (knots). It is easier to make strong bows from them and straighter ones.
CURVY WOODS
The wood with curves or knots are often more difficult to work, but the bowyer like challenges and especially unique bows, far from the standardized industral ones!
There are different kinds of wood curves:
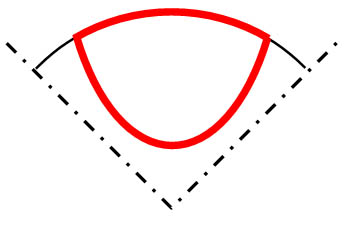
– the branch is curved over its entire length and in a single dimension. In this case, it is often possible to take out one side to obtain a bow with natural reflex (more efficient). However, other parts of the trunk will be more difficult to use.
– the branch is curved in one dimension, but the curve is located at one or more locations. If the curve is to the handle, the situation is close to the first case. Otherwise, it is always possible to use it, but the tillering will be more difficult, and the shape of the bow will be less regular.
– the branch is curved in multiple dimensions. This is a difficult case when tillering … Not for beginners, even if the shape is particularly pretty.

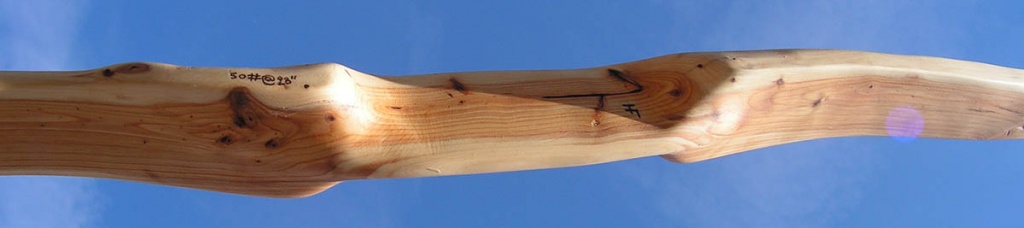
 Hazel flatbow – 50#@28″
AND SAWMILL?
An « easy » solution is to buy wood from sawmill or in a DIY store. It is quite possible to make high-performance bows! The US bowyer Tim Baker makes many bows from this way and that’s very quick to make because first steps are not necessary and only remain the base of bow making: the tillering.
With commercial wood, the difficulty is that you knows nothing of their characteristics (place of growth, location, drying …) so it is difficult to learn from mistakes. For cons, the advantage is to choose the rarest woods in our regions.
The main difficult to get out bows of boards is to find a piece of wood cut following the grain … which is only 1 or 2% of wood you can found in sawmill … with patience is therefore possible to find (or with the help of an employee who made a pre-selection and lets you pieces aside). However, if you have the patience to select wood from sawmill, you would also have to walk in a green land to find your tree and work it until you make a unique bow!
In the case of commercial timber, it can take in every direction, but we must rework the surfaces to recover the sense of the wood fibers.
The alternative is to select a board whose fibers are not cut so much, you cut it with a power saw according to the final bow shape and place a backing (fibers on the back of the bow for strengthening). The backing (or reinforcement) prevents the bow to break, but slightly heavier limbs (less efficient).


Regarding our explanations, we try to stay in the medieval area, so choosing a living tree !
DIAMETER
Naturally, it will be easier to find a branch of a small diameter, but you will have less possibilities to make a bow from this. The diameter measured at the handle of the bow is the most important as it often determine the final weight of the bow. For heavy woods like black locust, hawthorn, dogwood, we can consider the thickness of the bow will be about 10-20% thinner (a smaller trunk is needed). For light wood such as hazel, willow, add 10-20%, and also for wood that had a faster growth.
Here are some possibilities depending on the diameter of the log (the back of the bow is at the top of the drawings for simplicity):
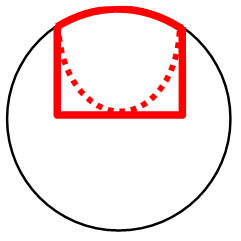
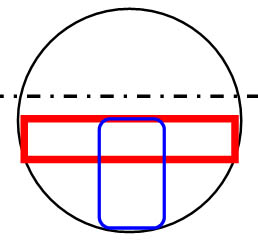
Less than 5cm (2″)
 Priority to flatbow
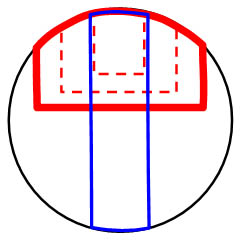
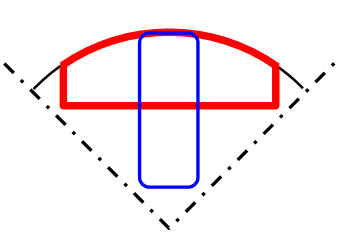
You have to retain entire thickness of the wood at the handle (blue) and remove half the thickness to the branches (in red) and decrease in width and thickness throughout the branch.
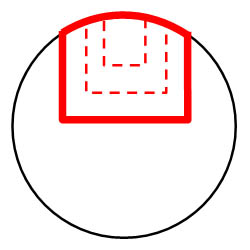 Longbow possible (weaker)
Choose a flat belly section (square), because the D cross section will make lose weight (and rather look like a circle). Remove half of the thickness of the branch or the bow will have more breaking risks.
A small diameter increases the curve on the back of the bow which will be slightly less efficient.
There is also more material to be removed (more than half of the log), which can slightly increase the manufacturing time.
Examples of flatbow made from small diameter :

 Flatbow 50#@28″ Ash
 Flatbow 50#@28″ Yew sapling
And a weaker longbow from a spaling :

 Longbow 30#@28″ Yew sapling
Between 5 & 8 cm (2″ – 3″)
 Make a longbow first ( square or D cross section).
Big enough to make bow of 50 lbs and more.
 Possible to make a classical flatbow
Same as smaller diameter. The thickness of the handle (blue) will be 4-5 cm only so more wood will be removed (more time consuming but allows high strength).
 Possible to make flatbow worked backwards. You’ll have to split wood carefully and place the back of the bow to the heartwood side. This allow a perfectly rectangular section (more efficient), but increases the breaking risk if you do not correctly follow the fibers of wood at back side.
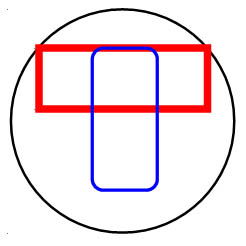 Possible to make decrowned flatbow
This is an intermediate solution between classical (round backed) and backwards flatbow. You must cut the first rings on the back till it’s flat but pay attention to follow the wood fibers. The branches must be out of the center of the branch (or it often break).
Possible to split and make 2 longbows
Theoretically, it is possible to split a small diameter log to make 2 light longbows. However, the splitting is never perfect and sometime you’ll lose both part. It is then possible to saw off-center to work on the biggest part of the log (reduce working time). Splitting off-center is often impossible because the cut goes to the heart naturally (except if the heart isn’t at the center of the log).
Example of a backward flatbow (back on picture 1, belly picture 2) :
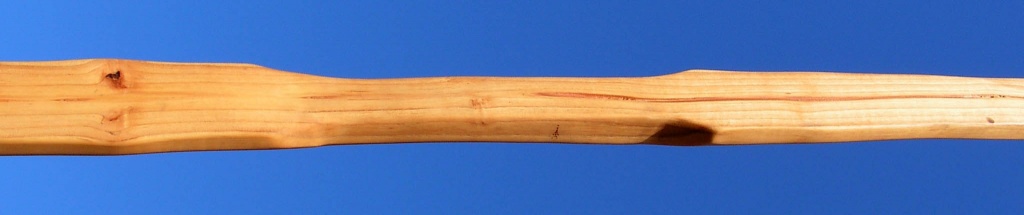
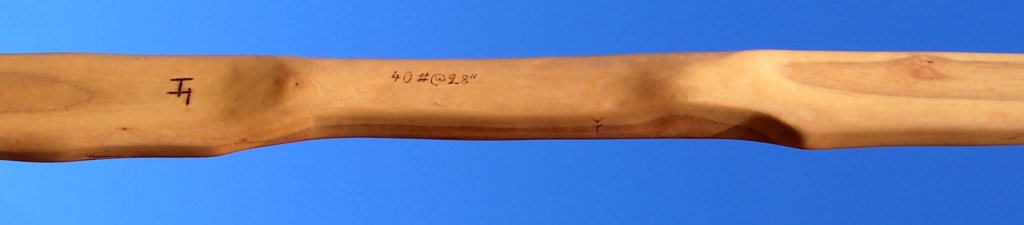 Flatbow 40#@28″ Ash
Between 8 and 15 cm (3″ and 6″)
 Split the log
Making a single bow would be a waste of time. It is necessary to split the trunk in half to make 2 bows. This is what we’ll make on our example (details throughout explanations) or here on picture (in french)
Flatbow or longbow may be made (flatbow weaker for smaller sections). For longbows, prefer the squared cross section because you’ll have to take out more wood with D section (waste of time).
Possible to make backwards and decrowned bows.
More than 15 cm (6″)
This section allows for all types of bows.
Depending on the diameter, it will be possible to split into 4, 6, 8… to make almost as many bows.
 Make heavy longbows
The shape of the quarter is suitable for making D cross section longbows (less wood to remove).
This is in our opinion the main reason for the use of the D cross section for longbows found in the Mary Rose (XVIth century): to make as many bows as possible on a log (the yew is rare) and time reason (they have to make a lot for battle).
Example of D cross section longbow:

 Longbow 50#@28″ yew
Make flatbows in every senses !
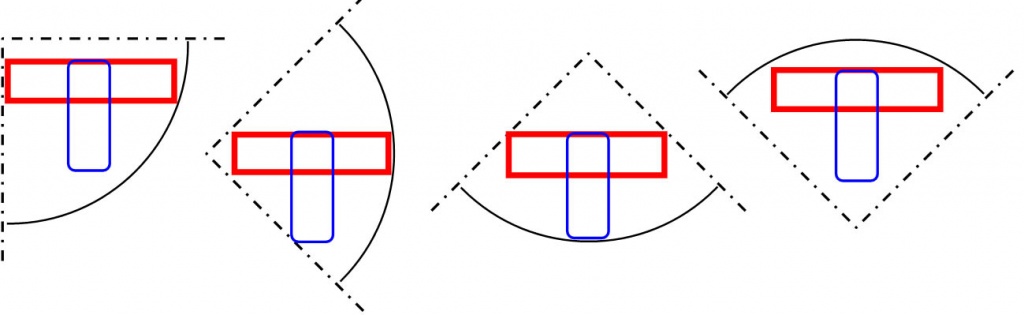
To avoid the break of the bow, you’ll have to follow the curves of the rings on the back of the bow (solution 1). Otherwise, quarters can be worked in all directions to make rectangular flatbows: oblique rings, perpendicular, decrowned…
Example an oblique worked flatbow (solution 2) :
 Flatbow 50#@28″ Maple
Very large logs
Some bowyers cut only the large trunks (more than 20-30 cm in diameter – 8”-12”)… why not! The back of the bow will be less rounded which slightly improve performances (especially for flatbows). A larger diameter also « erase » some undulations of the wood, which make the work easier and the bow straighter. But the tree will be harder to find, cut, transport, split…
 In our readings, we discover that bowyers who search large trees generally cut the quarter into squared timber that will be left some years for seasoning. This beam is then reworked to give it its final bow shape (D or others cross section). This method requires a much bigger section.
We have not experienced this technique, but it seems to work perfectly except we believe there is a significant loss of wood (unfortunate with yew or rare wood).
In Brief
For D section longbows, it will always be easier to split a large trunk into 4 or more parts, because the shape is closer to the final section of the bow. For flatbows, small sections work fine … it also seems to be the case for Holmegaard type bows.
One may wonder what log section was chosen in the Middle Ages to make their bows. We don’t know studies on this subject of the Mary Rose bows or any other old bows found, but this question seems useful (archaeologists sometimes have very different questions than bowyers).
However, in the French text of the late XVth century, the author speaks of using elderberry and buckthorn (or hawthorn). This shrubs has rarely large sections, which might suggest that they are not necessarily looking for very large diameters.
OUR EXAMPLE
To illustrate this text, we’ll make 2 bows and explain the choices, options … We don’t have a lot of centenarian yew trees to cut, so we’ll choose a more common species.
The first question : where to find the tree ? In your garden, for example, but the trees grow rarely in the best conditions.
For this example, we choose a road embankment. The terrain is more rocky, water does not remain on site (slope), the trees are tight and pushed height. Moreover, it does not bother anyone if a tree among thousands of others is cut along a road!

The roadsides are full of useful tree species for making bows, so you certainly find one that is perfect. In our case, an ash tree with a trunk diameter of about 10cm seems to be good. It is quite straight in the first 3 meters, which will make the job easier.
 RETURN
Text, pictures & schemas : Fabien Houssin
![]()